Creating and Configuring Surveys
Every setting on the survey page, what it does, and what to pick if you're not sure.
This is the reference for the survey edit page. If you're just trying to get a survey running, [Getting Started](/help/getting-started) is the quicker walkthrough — come back here when you want to understand a specific setting.
The three tabs
Every survey has three tabs at the top of the page.

- Settings — name, welcome message, rating style, threshold, review platform. The configuration of the survey itself.
- Questions — the follow-up questions customers see if they rate below your threshold. See [Using the Form Builder](/help/survey-form-builder).
- Share & Collect — the direct link, BCC address, QR code, and reminder timing. See [BCC Email Setup](/help/email-bcc-setup) and [QR Codes](/help/qr-codes).
The number badge next to Questions shows how many you've added.
General settings
The Survey Name is purely internal — customers never see it. Name it after the location, channel, or product line so the feedback feed stays organized when you have several. "Berlin store" and "Online checkout" are clearer than "Survey 1" and "Survey 2".
The Survey Language controls all built-in copy: button labels, validation messages, the "thanks for your feedback" screen. Your own welcome message stays in whatever language you wrote it. Picking the right language matters more than you'd think — German customers get suspicious of half-English forms.
Landing page
The Welcome Headline and Welcome Description are what your customer reads first. Defaults work fine. The thing to avoid is asking for a review in the welcome ("Please leave us a 5-star Google review!") — the whole point is that the customer hasn't been routed yet, so framing it as a review request defeats the smart-routing model.
If you uploaded a logo on the [Account Settings](/help/account-settings) page, it shows above the welcome message automatically. No per-survey logo override (yet).
Rating style
Three options for how the rating shows up.

- Stars (1-5) — the default, most familiar to most customers
- Emojis — softer, friendlier, often used for service/hospitality
- Numbers (1-5) — neutral, used when a numeric scale is part of your brand or quality system
There's no "right" choice. All three feed the same underlying 1-5 score, so analytics and thresholds work the same regardless. Pick whichever fits your brand.
Rating threshold (the most important setting)
This is the gate. Customers at or above the threshold get sent to your public review platform. Customers below it stay on the survey and answer your private follow-up questions.
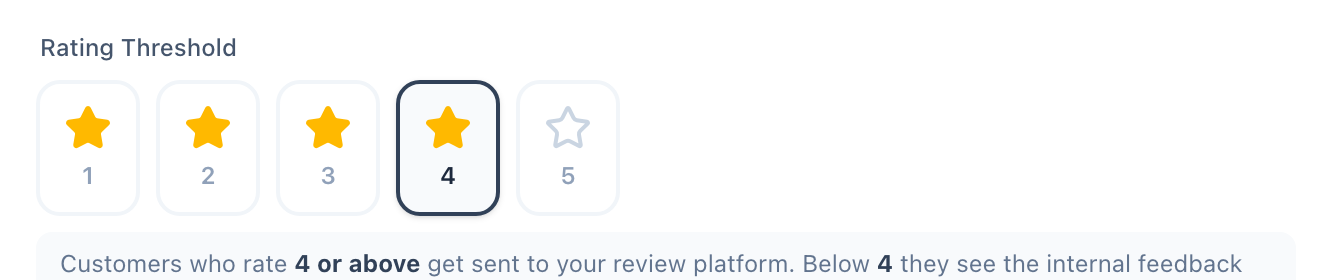
- Threshold = 5 — only perfect ratings go public. Maximum protection for your average score, but you miss out on routing the genuinely-happy 4-star customers.
- Threshold = 4 — the default. Most businesses land here. 4s and 5s go public; 1s, 2s, and 3s stay internal.
- Threshold = 3 — more permissive. Some 3-star customers will leave lukewarm public reviews. Use when you have strong public ratings already and want more review volume.
Start with 4. Change it only if you have a specific reason.
Review platform
Pick the platform, paste the URL. See [Getting Started](/help/getting-started) for the walkthrough on this section — the picker has hints under each platform telling you where to find your link.
If you want to receive all feedback privately (no public routing at all), select Other and leave the URL blank. The threshold then doesn't matter — everyone sees the internal form.
Reminders
If a customer doesn't respond to the first invitation, RateMind can send follow-up emails automatically. Configure how long to wait and how many reminders to send.
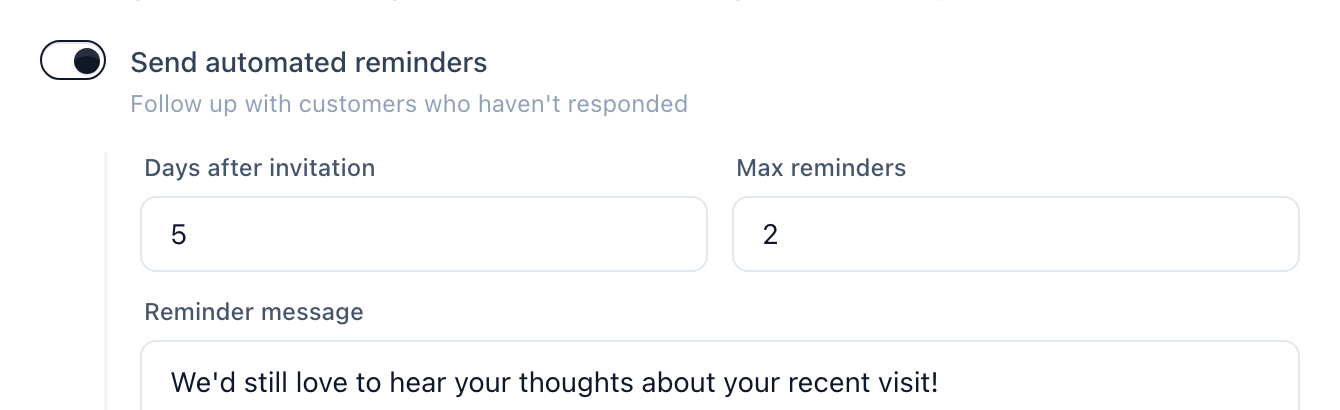
- Days after invitation — how long to wait before the first reminder. 3-5 days is typical. Sooner feels pushy; later and the experience is too stale to matter.
- Max reminders — total follow-ups. We recommend 1 or 2. Anything more is harassment.
- Reminder message — a short note that goes above the rating prompt in the reminder email. "We'd still love to hear your thoughts" is a fine default.
Reminders only fire for email invitations (the BCC method). QR codes and direct links don't capture an email, so there's no one to remind.
Activating and deactivating
A survey is active by default. To pause it without deleting, open the survey list, find your survey, and toggle it off. Inactive surveys reject any new feedback attempts — useful for seasonal or campaign-specific surveys.
What's next
- [Using the Form Builder](/help/survey-form-builder) — design the questions customers see below the threshold
- [BCC Email Setup](/help/email-bcc-setup) — wire your existing email flow into RateMind without integrations
- [QR Codes](/help/qr-codes) — print-ready feedback collection for physical locations